Delves are small-group adventures for 1-5 players together with an NPC companion. This guide will show you what you need to know about Delves, including their locations, scaling, seasonal companions, hazards, tips, tricks, and rewards.
About Delves in TWW
Delves are short-form instanced scenarios that you can run solo or in a group of 2-5 players in about 10-20 minutes. Parties of 1-4 players are accompanied by a seasonal NPC companion that can be designated Combat or Healer depending on your needs, so any class or spec can play Delves in any role they choose. Combat and Utility trinkets for your Companion can tailor their abilities to fit your requirements and can be changed inside the Delve. As you complete more Delves, your NPC Companion levels up and becomes more useful, not just for you, but for everyone in your Warband, since Companion Experience is shared. Full groups of 5 will not include the NPC companion.
There is a scenario and story with each Delve. Maps are static and the themes, general hazards, and mob mixes carry from one week to the next. However, there will be variations, such as which hazards are present, the overall scenario objectives, and random bonuses. Each Delve has its own end boss; however, the end boss is not always part of that week's configuration.
Players are introduced to Delves shortly after the beginning of the campaign when a quest sends you to the first delve, Earthcrawl Mines on the Isle of Dorn. This introduces you to your NPC companion and to the basic tools you'll need to make the most out of Delves.
Delves will follow a Seasonal format similar to other PvE content in TWW. Before the launch of Season 1, tiers 1-3 will be available. Each Delve has story variations that are included at the end of the Delve Overviews section.
Unlocking Delve Tiers
The first time your character enters a Delve, it will begin at Tier 1, with all other tiers greyed out. Until that first character reaches level 80, only the first three Tiers will be available.
Once you reach level 80, complete the campaign on your first character, and have at least 548 gear in every slot, you will unlock the achievement ![]() War Within Delves: Endgame, which gives you access to Tier 4 delves. Completing a Delve tier successfully will open the next Tier (finishing Tier 4 opens Tier 5, finishing Tier 5 opens Tier 6, etc), up to the maximum, Tier 11.
War Within Delves: Endgame, which gives you access to Tier 4 delves. Completing a Delve tier successfully will open the next Tier (finishing Tier 4 opens Tier 5, finishing Tier 5 opens Tier 6, etc), up to the maximum, Tier 11.
Players in parties will only be able to do the highest Delve completed by one member of the party. For example, if there are 3 players in the party, 2 can do Tier 8 and one can do Tier 6, that party will only be able to do up to Tier 6.
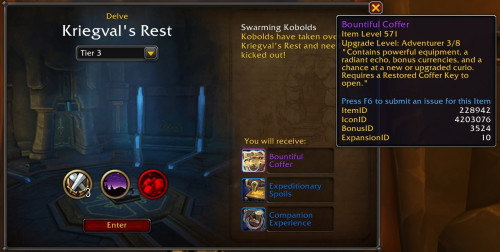
Completing a Tier in one Delve opens that tier level to all Delves, both for you and for your Warband. The Delve screen allows you to choose the tier and see the level, overall hazards, and rewards.
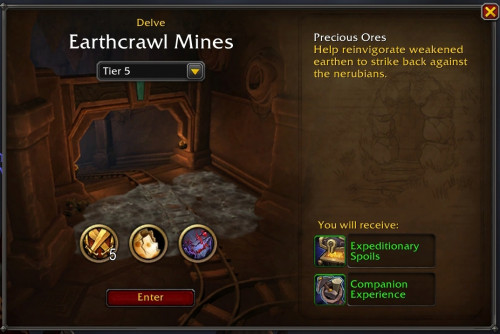
Similar to Torghast, Delve Tiers have recommended minimum iLevels. You can do Tiers above the recommended level if you choose. Tier 8 gives maximum-level rewards; Tiers 9-11 are primarily for completing achievements.
| Tier Number | Recommended iLevel |
| Tier 1 | 561+ |
| Tier 2 | 564+ |
| Tier 3 | 571+ |
| Tier 4 | 577+ |
| Tier 5 | 584+ |
| Tier 6 | 590+ |
| Tier 7 | 597+ |
| Tier 8-11 | 603+ |
Delve Locations
There are Delves located on the Isle of Dorn, Hallowfall, The Ringing Deeps, and Azj-Kahet. Zekvir's Lair in Azj-Kahet will launch at some point after The War Within's launch.
| Isle of Dorn | Hallowfall | The Ringing Deeps | Azj-Kahet |
| Earthcrawl Mines | Skittering Breach | The Waterworks | The Spiral Weave |
| Kriegval’s Rest | Nightfall Sanctum | The Dread Pit | Tak-Rethan Abyss |
| Fungal Folly | The Sinkhole | The Underkeep | |
| Mycomancer Cavern | Zekvir's Lair |
Delver's Headquarters in TWW
Delver's Headquarters is located in Dornogal at /![]() Resonance Crystals, and make modifications to your seasonal Delve Companion (this can also be done inside the delves).
Resonance Crystals, and make modifications to your seasonal Delve Companion (this can also be done inside the delves).

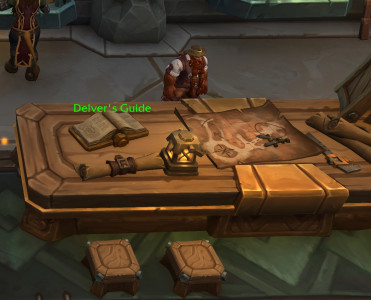
The Delver's Guide inside the Delver's Headquarters helps you track your progress through Delves toward different rewards. By successfully completing Delves, you'll earn transmogs, modifications to your ![]() Delver's Dirigible mount,
Delver's Dirigible mount, ![]() Resonance Crystals, and other rewards such as more favorable prices to purchase items from the Delvers' two vendors, Reno Jackson and Sir Finley Mrrgglton.
Resonance Crystals, and other rewards such as more favorable prices to purchase items from the Delvers' two vendors, Reno Jackson and Sir Finley Mrrgglton.
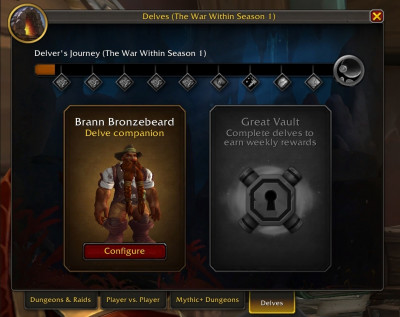
In addition, you can use the Delver's Guide to access information about your seasonal Companion and check your Great Vault progress.
Delve Rewards in TWW
Delves can be a great source for gear loot equivalent to Heroic or Mythic+ gear at higher levels. Delves are now part of the Great Vault system, and you can earn Delve-exclusive rewards such as the ![]() Delver's Dirigible, a customizable ridealong flying mount, and a second mount from the meta-achievement,
Delver's Dirigible, a customizable ridealong flying mount, and a second mount from the meta-achievement, ![]() Ivory Goliathus.
Ivory Goliathus.
-
Each Delve ends in a Treasure Room with Heavy Trunks that offer personal loot such as gear tuned to your class and level,
 Resonance Crystals,
  Undercoin, Companion upgrades, quest items, cosmetics, and more.
-
Tier reward levels improve through Tier 8. In Tiers 9-11, you'll still get rewards, but they won't be higher quality than what you can get in Tier 8. Tier 11 is primarily for bragging rights and some achievements.
-
Gear rewards from Bountiful Delve chests will scale based on difficulty level and will cap out at 603 Item Level.
-
Gear rewards through the Great Vault from completing multiple Delves will cap at 616 Item Level.
-
End bosses can drop 40x
 Mote of Fires for the meta quests
  Archives: The First Disc and
  Archives: Seeking History.
-
There will be a weekly world event, the
 Delves Bonus Event, that promises increased rewards for completing Delves!
Starting with Tier 4, you will also need to deal with ![]() Zekvir's Influence, which empowers a random group of enemies inside the Delve. Defeating them will provide additional
Zekvir's Influence, which empowers a random group of enemies inside the Delve. Defeating them will provide additional ![]() Undercoin and
Undercoin and ![]() Delver's Journey progress at the end of the delve. This will affect 1 set of enemies starting in Tier 4 and affects more as you move up in tiers.
Delver's Journey progress at the end of the delve. This will affect 1 set of enemies starting in Tier 4 and affects more as you move up in tiers.
Delves and The Great Vault
In TWW, the PvP row in The Great Vault is replaced with a World option. Completing 3, 6, or 12 Delves or World Activities will unlock World Slots in The Great Vault. The Item Levels from World gear in The Great Vault will scale with difficulty like the other rows and can reach up to Heroic raid gear or Mythic 15+ dungeon gear depending on the difficulty of the delves involved.
You can also see your Great Vault progress in the Delver's Guide, along with your Delve progress toward different reward levels. It's on the table near your seasonal Delve Companion.
Delver's Dirigible
The first character who reaches level 80 and has completed the campaign through ![]() Urban Odyssey will get the quest
Urban Odyssey will get the quest ![]() Bountiful Delves from Brann Bronzebeard in Dornogal (see the section below about obtaining a
Bountiful Delves from Brann Bronzebeard in Dornogal (see the section below about obtaining a ![]() Restored Coffer Key). Once you have completed this, you will get the followup quest
Restored Coffer Key). Once you have completed this, you will get the followup quest ![]() Ship It! and be awarded your own
Ship It! and be awarded your own ![]() Delver's Dirigible flying mount.
Delver's Dirigible flying mount.
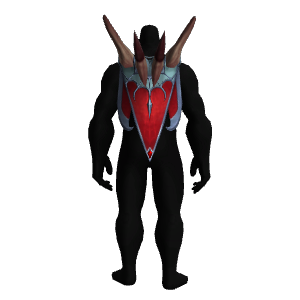
This Dirigible can earn cosmetic upgrades by completing other Delve-related activities, including achievements. You can see the Dirigible in action below:

ountiful Delves and Restored Coffer Keys
At level 80, you'll have a chance to get a Bountiful Delve. The ![]() Bountiful Delves quest comes from the Delver's Journal in Dornogal; we don't yet know all the conditions to unlock this quest, but will post details once we know. It instructs you to acquire a
Bountiful Delves quest comes from the Delver's Journal in Dornogal; we don't yet know all the conditions to unlock this quest, but will post details once we know. It instructs you to acquire a ![]() Restored Coffer Key and find a Delve that offers a
Restored Coffer Key and find a Delve that offers a ![]() Bountiful Coffer as a reward. The
Bountiful Coffer as a reward. The ![]() Bountiful Coffer rewards more powerful gear, a
Bountiful Coffer rewards more powerful gear, a ![]() Radiant Echo, bonus currencies, and a chance at a new or upgraded Curio for your Delve Companion.
Radiant Echo, bonus currencies, and a chance at a new or upgraded Curio for your Delve Companion.
You can only obtain ![]() Restored Coffer Keys at level 80. There are several ways to do this:
Restored Coffer Keys at level 80. There are several ways to do this:
-
Your first 4 weekly caches you earn from World Events will grant
 Restored Coffer Key. These can include rewards from
  Awakened Mechanical Cache,
  Lamplighter Supply Satchel,
  Pinnacle Cache, [
 Radiant Cache,
  Seasoned Adventurer's Cache,
  Theater Troupe's Trove, and one of the three Pact chests
  The General's War Chest,
  The Vizier's Capital, or the
  The Weaver's Gratuity
-
Collect and combine 100x
 Coffer Key Shards to create a
  Restored Coffer Key.
  Coffer Key Shards come from World Quests, Radiant Echoes, and outdoor events throughout Khaz Algar.
-
Specific Renown thresholds grant you a
 Restored Coffer Key. Visit the respective Quartermaster upon achieving these levels:
-
Council of Dornogal - Renown 17
-
Assembly of the Deeps - Renown 13
-
Hallowfall Arathi - Renown 14
-
Severed Threads - Renown 13
-
-
 Restored Coffer Key can be bought from Sir Finley Mrrgglton once Season 1 starts for 2,000
  Undercoin by progressing through the Delve track. The cost is reduced by 50% by progressing further in the Delve track.
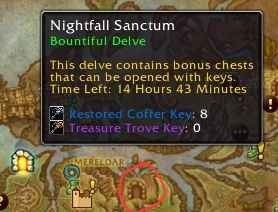
The location of the Bountiful Delve rotates, so you will need to check your map to see which Delve is considered Bountiful. Bountiful delves appear with a glowing golden door. Mousing over it will tell you what you need to know, including how long that Delve will remain Bountiful.

Common Delve Features
Every Delve progresses in the same fashion:
-
There is an overarching goal, such as killing a percentage of mobs, following a short series of tasks, or finding/
rescuing a set number of items or NPCs. This is usually spread over several rooms or levels. -
There may be objects such as ropes or bouncy mushrooms you'll need to use to get from level to level. Pay attention because backtracking under these circumstances is a pain.
-
There are hazards such as ground effects, items you need to carry that protect you for a limited time, area-of-effect traps, etc. The vast majority of hazards in Delves can be summed up in four words: don't stand in it.
-
Once this goal is complete, there is an end boss or end encounter such as a series of ambushes that need to be defeated.
-
All hazards are removed and you can enter the Treasure Room to reap the rewards!
In addition, all Delves share a few positive features:
-
There are common encounters you can fight that will award Boons (Anima Powers for Delves) to your entire party for the duration of the Delve -- mostly silver elites or special treasures marked on your map. For example, if you encounter Reno Jackson and Sir Finley Mrrgglton inside a delve, fight them to earn the boon
 Reno's Random Reactions.
 -
Sturdy Chests do not appear on the map, but can still contain valuable items. There is an achievement,
 Leave No Treasure Unfound, for looting all Sturdy Chests in each of the 12 primary delves. This achievement is needed for the meta-achievement to earn the
  Ivory Goliathus mount. It also rewards you with a title, %s, Seeker of Loot.
 -
Sometimes small Mislaid Curiosity items may appear. These are small items like a little jar or mushroom with a purple glow that, when clicked, can give varying amounts of Companion experience:
 Chunk of Companion Experience (100),
  Chunk of Companion Experience (250), or
  Chunk of Companion Experience (525).
 -
Delves can have Herbalism and Ore nodes, as well as Fishing pools. Some of these can be rare versions. Once your Companion has the ability
 Gathering Tools, you'll get ore, herbs, and skins from Brann, whether you know those skills or not.
Delve Revive Counter
At Tier 4 and above, each Delve has a Revive counter -- the number of unresurrected deaths you can take before failing the Delve. This is similar to Torghast's death counter, although in this case, it matters for the quality of the loot you get. The fewer deaths you get, the higher quality loot you will earn at the end.
You can circumvent getting a Revive hit by resurrection spells. However, Soulstone revives count as unresurrected deaths and will incur a Revive counter hit.
Delve Boons
Delve Boons are bonuses like Anima powers that you can earn by fighting certain encounters inside the Delve. These usually come from fighting silver elite mobs such as the Stolen Loader, picking up unusual items such as a Construct Canker, or inside random chests inside the Delve. Once awarded, these stay with the player or party through death until leaving the Delve. There are no choices; you get what you get.
Basically, if it looks odd or out of place, interact with it to see what happens. What could possibly go wrong?
Examples of Boons include:
-
 Reno's Random Reactions - Chance when attacking an enemy to throw a random item from Reno's backpack. The item may root, stun, or damage the enemy and enemies around them.
-
 Perfect Shield - When your health drops below 25%,
gain immunity to all damage, harmful effects, knockbacks and forced movement effects for 10 sec. -
 Loader Signal - While in combat, a Magnetic Loader has a chance to assist you, pulling enemies towards it for 5 sec before exploding for 178279 Fire damage. Can only happen every 120 sec.
-
 Construct Canker - Increases your damage done by 15% and size by 20%. This effect lasts until you're brought beneath 50% health.
![]() Gathering Tools also gives Brann Bronzebeard a chance to find a Boon while locating treasure. This appears in the form of an Ancient Artifact (it looks like a chalice]. Clicking this will award a Boon that gives a small percentage bonus to a primary stat, such as
Gathering Tools also gives Brann Bronzebeard a chance to find a Boon while locating treasure. This appears in the form of an Ancient Artifact (it looks like a chalice]. Clicking this will award a Boon that gives a small percentage bonus to a primary stat, such as ![]() Ancient Power, or to a secondary stat such as
Ancient Power, or to a secondary stat such as ![]() Ancient Swiftness,
Ancient Swiftness, ![]() Ancient Savagery, or
Ancient Savagery, or ![]() Ancient Hunger.
Ancient Hunger.
The War Within Delves Companion: Brann Bronzebeard
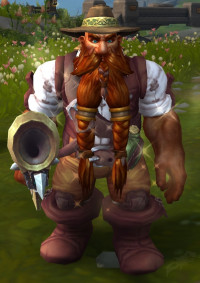
Brann Bronzebeard is your NPC Companion for Delve adventures in Season 1. He will automatically join any group of 1-4 players, but will not accompany full groups of 5.
Here are some general facts about NPC Delve Companions:
-
Companions can use Curios, which are Companion-specific Combat and Utility trinkets. These are looted from the end chests when completing a Delve.
-
Companion Experience allows your Companion to learn new abilities and use higher-level Curios. Companions gain Companion Experience in the following ways:
-
defeating mobs inside a Delve
-
looting the end treasure chests when completing Delves
-
picking up items on the floor that give additional Companion Experience (not always available)
-
-
Companion Experience is shared with your Warband.
-
Companions Skin, Mine, Herb, and Fish throughout the Delve, giving you valuable crafting materials. You do not need to know the professions for this.
-
Companions will give you notifications of nearby treasures warnings about dangers -- listen to what they have to say!
Companion Roles
Brann can be defined either as Combat or Healer. He will still deal damage while in Healer form, but he will have better damage output in Combat form.
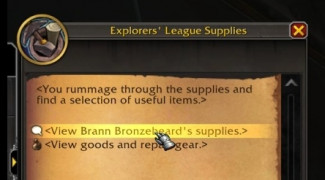
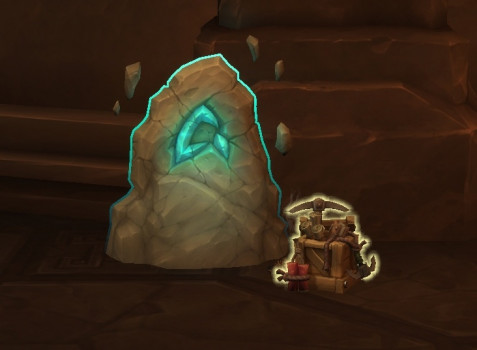
You can only change Brann's role by clicking on the Explorers' League Supplies box and selecting "View Brann Bronzebeard's supplies". There is one at the beginning of the Delve and a second one when you reach the Respawn Point in the middle of the Delve. Explorers' League Supplies also give you a place to sell items and repair.
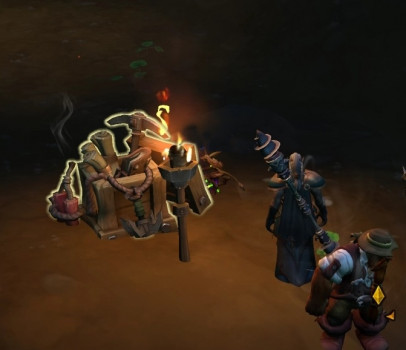
| Level | Ability | Description |
| 1 | Brann hurls steel traps that snaps shut on the first enemy that approaches, wounding them for moderate Physical damage instantly and additional Bleed damage over time. | |
| 2 | (Spell #433995) | |
| 3 | Brann uses his whip to lash the enemy, interrupting enemy spellcasting and preventing any spell in that school from being cast for 3 sec. | |
| 4 | Brann summons a devilsaur egg. Hopefully it hatches. | |
| 5 | Brann uses his gathering tools to help players find additional gold, ore, herbs, fish, leathers, and treasures. | |
| 6 | After 3 or more enemies attack a player, Brann will hurl an ice trap at them, reducing their movement speed by 50% and occasionally freezing them in place for 3 sec. Trap lasts for 15 sec. | |
| 8 | Brann will finish off wounded targets, executing enemies that have less than 30% health. The health threshold for this effect is reduced to 5% for boss creatures. |
|
| 9 | Brann temporarily enchants a nearby player's weapon for 10 sec, causing their spells and abilities to deal additional damage as fire, provided they remain in combat. When the enchantment is removed, the effect jumps to a nearby ally. |
|
| 10 | Your spells and abilities have a chance to call Brann's pet monkey Glibb to your side for 15 sec, bananas in hand. Aspect of the Monkey Glibb's presence empowers you, increasing Speed, Avoidance, and Leech increased by 845. Bad Monkey Glibb throws a temper tantrum, inflicting tremendous Physical damage to nearby enemies with a chance to stun them for 3 sec. |
|
| 11 | Season 1 Brann's combat mastery grants him 5% increased damage done by his spells and abilities. |
Even in Healer form, Brann Bronzebeard deals damage -- just not as much as in Combat role.
| Level | Ability | Description |
| 1 | Brann throws healing potions near injured players that restores a moderate amount of health upon walking through them. | |
| 2 | Brann brandishes a powerful ancient relic that radiates Holy energy, healing allies for a tremendous amount every 1 sec for 20 sec. | |
| 3 | Brann throws his rope to free players from stuns, bonds, and snares, and grants immunity to all such effects for 4 sec. | |
| 4 | Brann summons a devilsaur egg. Hopefully it hatches. | |
| 5 | Brann uses his gathering tools to help players find additional gold, ore, herbs, fish, leathers, and treasures. | |
| 6 | Brann cures an infected player removing all Poison and Disease effects, or purges an enemy target removing 1 beneficial magic effect. | |
| 8 | When any player falls below 30% health, Brann will instantly heal them for 25% of their maximum health. Can only occur every 3 min. | |
| 9 | Brann hurls a shield at all players, reducing their damage taken by 20% and preventing loss of control effects for 12 sec. | |
| 10 | Your spells and abilities have a chance to call Brann's pet monkey Glibb to your side for 15 sec, bananas in hand. Aspect of the Monkey Glibb's presence empowers you, increasing Speed, Avoidance, and Leech increased by 845. Bad Monkey Glibb throws a temper tantrum, inflicting tremendous Physical damage to nearby enemies with a chance to stun them for 3 sec. |
|
| 11 | Season 1 Brann's combat mastery grants him 5% increased healing done by his spells and abilities. |
Combat and Utility Curios in Season 1
Brann has both Combat Curios and Utility Curios and you can select 1 of each type to be active at any time. Like roles, Curios can only be swapped by clicking on the Explorers' League Supplies box and selecting "View Brann Bronzebeard's supplies". Curios drop from the treasure chests found in the Treasure Rooms at the successful conclusion of Delves.
All Curios have 1-4 power levels. These are upgraded by looting a higher-level version of a Curio, which happens as you progress into higher Tiers.
Delves are small-group adventures for 1-5 players together with an NPC companion. This guide will show you what you need to know about Delves, including their locations, scaling, seasonal companions, hazards, tips, tricks, and rewards.
About Delves in TWW
Delves are short-form instanced scenarios that you can run solo or in a group of 2-5 players in about 10-20 minutes. Parties of 1-4 players are accompanied by a seasonal NPC companion that can be designated Combat or Healer depending on your needs, so any class or spec can play Delves in any role they choose. Combat and Utility trinkets for your Companion can tailor their abilities to fit your requirements and can be changed inside the Delve. As you complete more Delves, your NPC Companion levels up and becomes more useful, not just for you, but for everyone in your Warband, since Companion Experience is shared. Full groups of 5 will not include the NPC companion.
There is a scenario and story with each Delve. Maps are static and the themes, general hazards, and mob mixes carry from one week to the next. However, there will be variations, such as which hazards are present, the overall scenario objectives, and random bonuses. Each Delve has its own end boss; however, the end boss is not always part of that week's configuration.
Players are introduced to Delves shortly after the beginning of the campaign when a quest sends you to the first delve, Earthcrawl Mines on the Isle of Dorn. This introduces you to your NPC companion and to the basic tools you'll need to make the most out of Delves.
Delves will follow a Seasonal format similar to other PvE content in TWW. Before the launch of Season 1, tiers 1-3 will be available. Each Delve has story variations that are included at the end of the Delve Overviews section.
Unlocking Delve Tiers
The first time your character enters a Delve, it will begin at Tier 1, with all other tiers greyed out. Until that first character reaches level 80, only the first three Tiers will be available.
Once you reach level 80, complete the campaign on your first character, and have at least 548 gear in every slot, you will unlock the achievement ![]() War Within Delves: Endgame, which gives you access to Tier 4 delves. Completing a Delve tier successfully will open the next Tier (finishing Tier 4 opens Tier 5, finishing Tier 5 opens Tier 6, etc), up to the maximum, Tier 11.
War Within Delves: Endgame, which gives you access to Tier 4 delves. Completing a Delve tier successfully will open the next Tier (finishing Tier 4 opens Tier 5, finishing Tier 5 opens Tier 6, etc), up to the maximum, Tier 11.
Players in parties will only be able to do the highest Delve completed by one member of the party. For example, if there are 3 players in the party, 2 can do Tier 8 and one can do Tier 6, that party will only be able to do up to Tier 6.
Completing a Tier in one Delve opens that tier level to all Delves, both for you and for your Warband. The Delve screen allows you to choose the tier and see the level, overall hazards, and rewards.
Similar to Torghast, Delve Tiers have recommended minimum iLevels. You can do Tiers above the recommended level if you choose. Tier 8 gives maximum-level rewards; Tiers 9-11 are primarily for completing achievements.
| Tier Number | Recommended iLevel |
| Tier 1 | 561+ |
| Tier 2 | 564+ |
| Tier 3 | 571+ |
| Tier 4 | 577+ |
| Tier 5 | 584+ |
| Tier 6 | 590+ |
| Tier 7 | 597+ |
| Tier 8-11 | 603+ |
Delve Locations
There are Delves located on the Isle of Dorn, Hallowfall, The Ringing Deeps, and Azj-Kahet. Zekvir's Lair in Azj-Kahet will launch at some point after The War Within's launch.
| Isle of Dorn | Hallowfall | The Ringing Deeps | Azj-Kahet |
| Earthcrawl Mines | Skittering Breach | The Waterworks | The Spiral Weave |
| Kriegval’s Rest | Nightfall Sanctum | The Dread Pit | Tak-Rethan Abyss |
| Fungal Folly | The Sinkhole | The Underkeep | |
| Mycomancer Cavern | Zekvir's Lair |
Delver's Headquarters in TWW
Delver's Headquarters is located in Dornogal at /![]() Resonance Crystals, and make modifications to your seasonal Delve Companion (this can also be done inside the delves).
Resonance Crystals, and make modifications to your seasonal Delve Companion (this can also be done inside the delves).
The Delver's Guide inside the Delver's Headquarters helps you track your progress through Delves toward different rewards. By successfully completing Delves, you'll earn transmogs, modifications to your ![]() Delver's Dirigible mount,
Delver's Dirigible mount, ![]() Resonance Crystals, and other rewards such as more favorable prices to purchase items from the Delvers' two vendors, Reno Jackson and Sir Finley Mrrgglton.
Resonance Crystals, and other rewards such as more favorable prices to purchase items from the Delvers' two vendors, Reno Jackson and Sir Finley Mrrgglton.
In addition, you can use the Delver's Guide to access information about your seasonal Companion and check your Great Vault progress.
Delve Rewards in TWW
Delves can be a great source for gear loot equivalent to Heroic or Mythic+ gear at higher levels. Delves are now part of the Great Vault system, and you can earn Delve-exclusive rewards such as the ![]() Delver's Dirigible, a customizable ridealong flying mount, and a second mount from the meta-achievement,
Delver's Dirigible, a customizable ridealong flying mount, and a second mount from the meta-achievement, ![]() Ivory Goliathus.
Ivory Goliathus.
-
Each Delve ends in a Treasure Room with Heavy Trunks that offer personal loot such as gear tuned to your class and level,
 Resonance Crystals,
  Undercoin, Companion upgrades, quest items, cosmetics, and more.
-
Tier reward levels improve through Tier 8. In Tiers 9-11, you'll still get rewards, but they won't be higher quality than what you can get in Tier 8. Tier 11 is primarily for bragging rights and some achievements.
-
Gear rewards from Bountiful Delve chests will scale based on difficulty level and will cap out at 603 Item Level.
-
Gear rewards through the Great Vault from completing multiple Delves will cap at 616 Item Level.
-
End bosses can drop 40x
 Mote of Fires for the meta quests
  Archives: The First Disc and
  Archives: Seeking History.
-
There will be a weekly world event, the
 Delves Bonus Event, that promises increased rewards for completing Delves!
Starting with Tier 4, you will also need to deal with ![]() Zekvir's Influence, which empowers a random group of enemies inside the Delve. Defeating them will provide additional
Zekvir's Influence, which empowers a random group of enemies inside the Delve. Defeating them will provide additional ![]() Undercoin and
Undercoin and ![]() Delver's Journey progress at the end of the delve. This will affect 1 set of enemies starting in Tier 4 and affects more as you move up in tiers.
Delver's Journey progress at the end of the delve. This will affect 1 set of enemies starting in Tier 4 and affects more as you move up in tiers.
Delves and The Great Vault
In TWW, the PvP row in The Great Vault is replaced with a World option. Completing 3, 6, or 12 Delves or World Activities will unlock World Slots in The Great Vault. The Item Levels from World gear in The Great Vault will scale with difficulty like the other rows and can reach up to Heroic raid gear or Mythic 15+ dungeon gear depending on the difficulty of the delves involved.
You can also see your Great Vault progress in the Delver's Guide, along with your Delve progress toward different reward levels. It's on the table near your seasonal Delve Companion.
Delver's Dirigible
The first character who reaches level 80 and has completed the campaign through ![]() Urban Odyssey will get the quest
Urban Odyssey will get the quest ![]() Bountiful Delves from Brann Bronzebeard in Dornogal (see the section below about obtaining a
Bountiful Delves from Brann Bronzebeard in Dornogal (see the section below about obtaining a ![]() Restored Coffer Key). Once you have completed this, you will get the followup quest
Restored Coffer Key). Once you have completed this, you will get the followup quest ![]() Ship It! and be awarded your own
Ship It! and be awarded your own ![]() Delver's Dirigible flying mount.
Delver's Dirigible flying mount.
This Dirigible can earn cosmetic upgrades by completing other Delve-related activities, including achievements. You can see the Dirigible in action below:
Bountiful Delves and Restored Coffer Keys
At level 80, you'll have a chance to get a Bountiful Delve. The ![]() Bountiful Delves quest comes from the Delver's Journal in Dornogal; we don't yet know all the conditions to unlock this quest, but will post details once we know. It instructs you to acquire a
Bountiful Delves quest comes from the Delver's Journal in Dornogal; we don't yet know all the conditions to unlock this quest, but will post details once we know. It instructs you to acquire a ![]() Restored Coffer Key and find a Delve that offers a
Restored Coffer Key and find a Delve that offers a ![]() Bountiful Coffer as a reward. The
Bountiful Coffer as a reward. The ![]() Bountiful Coffer rewards more powerful gear, a
Bountiful Coffer rewards more powerful gear, a ![]() Radiant Echo, bonus currencies, and a chance at a new or upgraded Curio for your Delve Companion.
Radiant Echo, bonus currencies, and a chance at a new or upgraded Curio for your Delve Companion.
You can only obtain ![]() Restored Coffer Keys at level 80. There are several ways to do this:
Restored Coffer Keys at level 80. There are several ways to do this:
-
Your first 4 weekly caches you earn from World Events will grant
 Restored Coffer Key. These can include rewards from
  Awakened Mechanical Cache,
  Lamplighter Supply Satchel,
  Pinnacle Cache, [
 Radiant Cache,
  Seasoned Adventurer's Cache,
  Theater Troupe's Trove, and one of the three Pact chests
  The General's War Chest,
  The Vizier's Capital, or the
  The Weaver's Gratuity
-
Collect and combine 100x
 Coffer Key Shards to create a
  Restored Coffer Key.
  Coffer Key Shards come from World Quests, Radiant Echoes, and outdoor events throughout Khaz Algar.
-
Specific Renown thresholds grant you a
 Restored Coffer Key. Visit the respective Quartermaster upon achieving these levels:
-
Council of Dornogal - Renown 17
-
Assembly of the Deeps - Renown 13
-
Hallowfall Arathi - Renown 14
-
Severed Threads - Renown 13
-
-
 Restored Coffer Key can be bought from Sir Finley Mrrgglton once Season 1 starts for 2,000
  Undercoin by progressing through the Delve track. The cost is reduced by 50% by progressing further in the Delve track.
The location of the Bountiful Delve rotates, so you will need to check your map to see which Delve is considered Bountiful. Bountiful delves appear with a glowing golden door. Mousing over it will tell you what you need to know, including how long that Delve will remain Bountiful.
Common Delve Features
Every Delve progresses in the same fashion:
-
There is an overarching goal, such as killing a percentage of mobs, following a short series of tasks, or finding/
rescuing a set number of items or NPCs. This is usually spread over several rooms or levels. -
There may be objects such as ropes or bouncy mushrooms you'll need to use to get from level to level. Pay attention because backtracking under these circumstances is a pain.
-
There are hazards such as ground effects, items you need to carry that protect you for a limited time, area-of-effect traps, etc. The vast majority of hazards in Delves can be summed up in four words: don't stand in it.
-
Once this goal is complete, there is an end boss or end encounter such as a series of ambushes that need to be defeated.
-
All hazards are removed and you can enter the Treasure Room to reap the rewards!
In addition, all Delves share a few positive features:
-
There are common encounters you can fight that will award Boons (Anima Powers for Delves) to your entire party for the duration of the Delve -- mostly silver elites or special treasures marked on your map. For example, if you encounter Reno Jackson and Sir Finley Mrrgglton inside a delve, fight them to earn the boon
 Reno's Random Reactions.
 -
Sturdy Chests do not appear on the map, but can still contain valuable items. There is an achievement,
 Leave No Treasure Unfound, for looting all Sturdy Chests in each of the 12 primary delves. This achievement is needed for the meta-achievement to earn the
  Ivory Goliathus mount. It also rewards you with a title, %s, Seeker of Loot.
 -
Sometimes small Mislaid Curiosity items may appear. These are small items like a little jar or mushroom with a purple glow that, when clicked, can give varying amounts of Companion experience:
 Chunk of Companion Experience (100),
  Chunk of Companion Experience (250), or
  Chunk of Companion Experience (525).
 -
Delves can have Herbalism and Ore nodes, as well as Fishing pools. Some of these can be rare versions. Once your Companion has the ability
 Gathering Tools, you'll get ore, herbs, and skins from Brann, whether you know those skills or not.
Delve Revive Counter
At Tier 4 and above, each Delve has a Revive counter -- the number of unresurrected deaths you can take before failing the Delve. This is similar to Torghast's death counter, although in this case, it matters for the quality of the loot you get. The fewer deaths you get, the higher quality loot you will earn at the end.
You can circumvent getting a Revive hit by resurrection spells. However, Soulstone revives count as unresurrected deaths and will incur a Revive counter hit.
Delve Boons
Delve Boons are bonuses like Anima powers that you can earn by fighting certain encounters inside the Delve. These usually come from fighting silver elite mobs such as the Stolen Loader, picking up unusual items such as a Construct Canker, or inside random chests inside the Delve. Once awarded, these stay with the player or party through death until leaving the Delve. There are no choices; you get what you get.
Basically, if it looks odd or out of place, interact with it to see what happens. What could possibly go wrong?
Examples of Boons include:
-
 Reno's Random Reactions - Chance when attacking an enemy to throw a random item from Reno's backpack. The item may root, stun, or damage the enemy and enemies around them.
-
 Perfect Shield - When your health drops below 25%,
gain immunity to all damage, harmful effects, knockbacks and forced movement effects for 10 sec. -
 Loader Signal - While in combat, a Magnetic Loader has a chance to assist you, pulling enemies towards it for 5 sec before exploding for 178279 Fire damage. Can only happen every 120 sec.
-
 Construct Canker - Increases your damage done by 15% and size by 20%. This effect lasts until you're brought beneath 50% health.
![]() Gathering Tools also gives Brann Bronzebeard a chance to find a Boon while locating treasure. This appears in the form of an Ancient Artifact (it looks like a chalice]. Clicking this will award a Boon that gives a small percentage bonus to a primary stat, such as
Gathering Tools also gives Brann Bronzebeard a chance to find a Boon while locating treasure. This appears in the form of an Ancient Artifact (it looks like a chalice]. Clicking this will award a Boon that gives a small percentage bonus to a primary stat, such as ![]() Ancient Power, or to a secondary stat such as
Ancient Power, or to a secondary stat such as ![]() Ancient Swiftness,
Ancient Swiftness, ![]() Ancient Savagery, or
Ancient Savagery, or ![]() Ancient Hunger.
Ancient Hunger.
Season 1 Delve Companion: Brann Bronzebeard
Brann Bronzebeard is your NPC Companion for Delve adventures in Season 1. He will automatically join any group of 1-4 players, but will not accompany full groups of 5.
Here are some general facts about NPC Delve Companions:
-
Companions can use Curios, which are Companion-specific Combat and Utility trinkets. These are looted from the end chests when completing a Delve.
-
Companion Experience allows your Companion to learn new abilities and use higher-level Curios. Companions gain Companion Experience in the following ways:
-
defeating mobs inside a Delve
-
looting the end treasure chests when completing Delves
-
picking up items on the floor that give additional Companion Experience (not always available)
-
-
Companion Experience is shared with your Warband.
-
Companions Skin, Mine, Herb, and Fish throughout the Delve, giving you valuable crafting materials. You do not need to know the professions for this.
-
Companions will give you notifications of nearby treasures warnings about dangers -- listen to what they have to say!
Companion Roles
Brann can be defined either as Combat or Healer. He will still deal damage while in Healer form, but he will have better damage output in Combat form.
You can only change Brann's role by clicking on the Explorers' League Supplies box and selecting "View Brann Bronzebeard's supplies". There is one at the beginning of the Delve and a second one when you reach the Respawn Point in the middle of the Delve. Explorers' League Supplies also give you a place to sell items and repair.
| Level | Ability | Description |
| 1 | Brann throws healing potions near injured players that restores a moderate amount of health upon walking through them. | |
| 2 | Brann brandishes a powerful ancient relic that radiates Holy energy, healing allies for a tremendous amount every 1 sec for 20 sec. | |
| 3 | Brann throws his rope to free players from stuns, bonds, and snares, and grants immunity to all such effects for 4 sec. | |
| 4 | Brann summons a devilsaur egg. Hopefully it hatches. | |
| 5 | Brann uses his gathering tools to help players find additional gold, ore, herbs, fish, leathers, and treasures. | |
| 6 | Brann cures an infected player removing all Poison and Disease effects, or purges an enemy target removing 1 beneficial magic effect. | |
| 8 | When any player falls below 30% health, Brann will instantly heal them for 25% of their maximum health. Can only occur every 3 min. | |
| 9 | Brann hurls a shield at all players, reducing their damage taken by 20% and preventing loss of control effects for 12 sec. | |
| 10 | Your spells and abilities have a chance to call Brann's pet monkey Glibb to your side for 15 sec, bananas in hand. Aspect of the Monkey Glibb's presence empowers you, increasing Speed, Avoidance, and Leech increased by 845. Bad Monkey Glibb throws a temper tantrum, inflicting tremendous Physical damage to nearby enemies with a chance to stun them for 3 sec. |
|
| 11 | Season 1 Brann's combat mastery grants him 5% increased healing done by his spells and abilities. |
Combat and Utility Curios in Season 1
Brann has both Combat Curios and Utility Curios and you can select 1 of each type to be active at any time. Like roles, Curios can only be swapped by clicking on the Explorers' League Supplies box and selecting "View Brann Bronzebeard's supplies". Curios drop from the treasure chests found in the Treasure Rooms at the successful conclusion of Delves.
All Curios have 1-4 power levels. These are upgraded by looting a higher-level version of a Curio, which happens as you progress into higher Tiers.
-
 Idol of Final Will - During combat, Brann designates a player to guide his shot for 4 sec before firing towards their location and dealing tremendous Physical damage to the first two enemies hit.
-
 Porcelain Arrowhead Idol - Brann's spells and abilities have a chance to weaken enemies, increasing the chance to critically strike them by 50% for 5 sec.
-
 Unbreakable Iron Idol - When any player's health falls below 40% health during combat, the idol awakens dealing moderate Physical damage to nearby enemies and taunting them for 10 sec. Can only occur every 2 min.
-
 Idol of the Earthmother - Brann's spells and abilities have a chance to awaken the idol, shielding an injured player for 70% of their missing health.
-
 Rage-Filled Idol - Brann enters an intense rage while in combat, periodically increasing his damage done by 5% every 2.5 sec for 10 sec.
Brann also suffers 3% of his maximum health in damage every 1 sec while this effect lasts. -
 Light-Touched Idol - When any player uses a defensive ability with a cooldown of 30 sec or longer, the idol activates and heals them for 4% of their maximum health every 1 sec for 10 sec.
-
 Relicblood of Zekvir - Randomly while in combat a bloodbeast will attach itself to Brann, periodically launching morsels of itself near players, granting Bloodstained Blessing upon walking through them.
Bloodstained Blessing
Increases damage and healing done by 2%, and reduces maximum health by 3% for 1 min. -
 Olden Seeker Relic - When Brann uses Gathering Tools, there is a 50% chance to unearth up to 2 powerful artifacts that grants your party a powerful Boon.
Gathering Tools
Brann uses his gathering tools to help players find additional gold, ore, herbs, fish, leathers, and treasures. -
 Time Lost Relic - Brann's spell and abilities have a chance to create bursts of energy, warping the flow of time for all nearby units by 30% for 12 sec.
Casting, movement, periodic effects, cooldowns, and attack speeds are affected while time warped. -
 Amorphous Relic - Upon entering combat, players gain either Massive or Miniature until combat ends.
Massive
Increases your size by 20%, maximum health by 20%, and damage and healing done by 12%.
Miniature
Reduces your size by 20%, increases movement speed by 20%, and your haste by 12%. -
 Streamlined Relic - While out of combat, the party's movement speed is increased by 40%. Upon entering combat, the party's haste is increased by 20% for 8 sec.
-
 Lifeless Necrotic Relic - The idol draws upon unholy energy to prevent fatal damage on players, instead healing them for an amount equal to 100% of their maximum health and turning them Undead.
While Undead, they cannot be healed, lose 5% of their maximum health every 1 sec, and gain 12% damage and healing done. -
 Relic of Sentience - When a Steel Trap is activated, there is a chance for Brann to throw an additional trap.
Delve Types by Mob Mix
Delves fall into 5 themes. This section describes some typical mobs and hazards; not every scenario will contain every hazard, but it's good to know about common ones.
Fungarian Delves
Typical Mobs
-
Wandering Elites: Fungal Speartender
Common Hazards
-
Sporbits are more like floating traps than mobs. They don't have a lot of hit points, but when killed, they explode and throw everything backward. It's best to remove them early, as they're kind of a problem if they get into the middle of a big fight.
-
In addition to Sporebits, many other mobs within Fungarian dungeons have knockback mechanics; keep your back to a wall or other immovable object when possible.
Kobold Delves
Typical Mobs
-
Wandering Elites: Kobold Taskfinder
Common Hazards
-
Kobold Delves often have an atmosphere mechanic such as
 Smothering Shadows or
  Suffocating Fumes that decreases maximum health rapidly, which can be countered by carrying an item such as a special Candle or Air Totem and staying within its radius. You will get one at the beginning of the dungeon and there will be opportunities to refresh it through the dungeon. This item's radius reduces with each step and will go out after completing 100 steps unless refreshed. Plan your path to minimize detours.
Hot tip from JenEricLive: In Delves where you have things like the totem and candle that you have to carry, it depletes with movement. You can right-click on the buff to drop the totem/
Suffocating Fumes that decreases maximum health rapidly, which can be countered by carrying an item such as a special Candle or Air Totem and staying within its radius. You will get one at the beginning of the dungeon and there will be opportunities to refresh it through the dungeon. This item's radius reduces with each step and will go out after completing 100 steps unless refreshed. Plan your path to minimize detours.
Hot tip from JenEricLive: In Delves where you have things like the totem and candle that you have to carry, it depletes with movement. You can right-click on the buff to drop the totem/candle on the ground so you can freely move and fight, and then pick it up to move to the next objective! -
There are typically Candle Flamethrowers that block hallways, casting multiple
 Candleburn jets across the space. These have a pattern, so you can usually figure out when it's safe to cross.
Nerubian Delves
Typical Mobs
-
Chittering Fearmonger isn't dangerous, but annoying because
 Fearful Shriek has a long duration and a short cooldown. Eliminate first.
Common Hazards
-
 Nerubian Webs slow your movement speed and spawn more mobs if you step on them. You may get a
  Magnetic Burst action button in some scenarios to help clear webs. Fortunately, neither Brann nor your pets will set these off. The spawns are typically more annoying than dangerous.
-
 Nerubian Eggs spread out Crawler Eggs covering an area, but will explode on contact or damage. When they explode, they do AoE damage and spread Nerubian Webs. However, you have to target them directly or step on them to set them off; AoE damage from you or pets does nothing to them. Avoid tab-targeting, watch your step, and you'll be fine.
Kobyss Delves
Typical Mobs
Mobs: Kobyss casters, big shark. Kobyss casters are masters of illusion, so expect friendly mobs to turn into Drowned Arathi or players being replicated through-
Common Mobs: Kobyss Witherer, Kobyss Trickster. Kobyss Trickster should get priority because they can cast
 Illusive Step that summons a Pale Illusion. These are not that sturdy, but they can keep a caster or healer tied up with interrupts.
 -
Wandering Elites: Wandering Gutter
Common Hazards
-
Kobyss live underwater, but their Delves also apply
 Aquatic Hex that prevents you from swimming (though Brann and any pets will still swim). Instead, you bounce-walk along the bottom. If you don't have Water Breathing spells or potions, you can use Air Bubbles to refresh your breath, and also for a movement speed buff.
-
If you jump off a ledge and it's a long way down, you'll die just as if you leaped off a normal outdoor cliff. It's easy to forget you're not really swimming.
-
Tip: If you are in one of the scenarios that has you rescuing Arathi Captives, look for the ones who do not have a pale tether coming out of their backs. Those will not turn to bad Kobyss when you free them.
Shadow Caster Delves
Typical Mobs
-
Elite Wanderer: Devouring Shade
Common Hazards
-
Avoid large purple, pulsing circles on the ground. Stepping inside triggers
 Spotted!, which brings a bombardment down on your head. Fortunately, these are slow-moving and predictable, so they are easy to avoid.
Delve Overviews
Waypoint locations will put you at the cavern entrance to the Delve. This may appear off from the location on the in-game map, but these waypoints more accurately represent where you want to go to enter the Delve area.
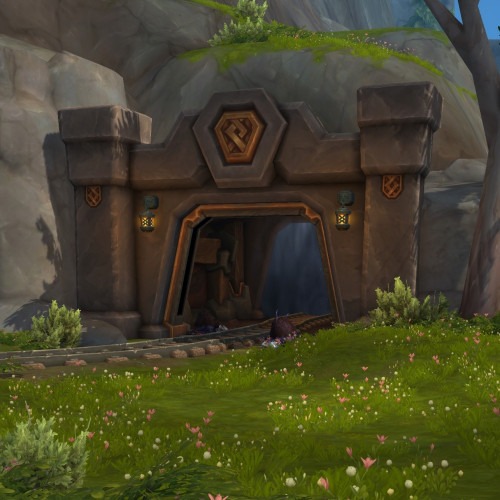
Earthcrawl Mines Location and Tips
Type: Nerubian
Location
/
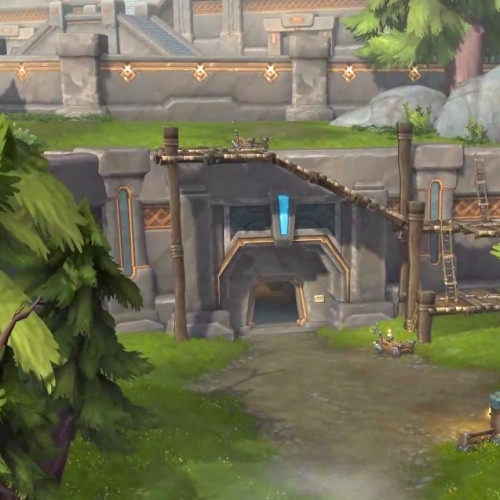
Out in the open; very easy to spot.
Boss
Web General Ab'enar does Nature and Shadow damage. When the floor covers with webs, jump off the tracks to avoid being run over by the flaming cart.
Tips and Tricks
Don't forget the ![]() Webbed Hookshot. It works at much longer distance than you think.
Webbed Hookshot. It works at much longer distance than you think.
Fungal Folly Delve Location and Tips
Type: Fungarian
Location
/
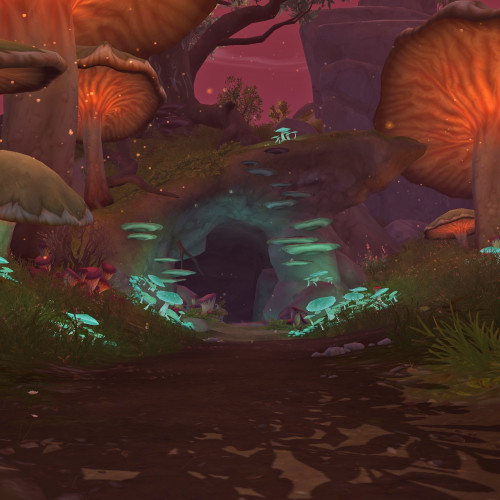
Lots of mushroom cover but fairly easy to locate. Entrance faces southeast.
Boss
Spinshroom -Tips and Tricks
There are several places you can avoid adds, but changing platforms doesn't shed active aggro. It takes a few seconds, but they will teleport up.Kriegval's Rest Delve Location and Tips
Type: Kobold
Location
/
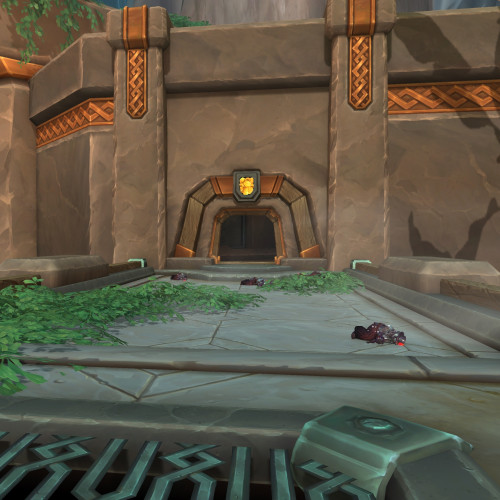
Lowest level; entrance faces west.
Boss
Tomb-Raider Drywhisker - major hazard isThe Dread Pit Delve Location and Tips
Type: Nerubian
Location
/
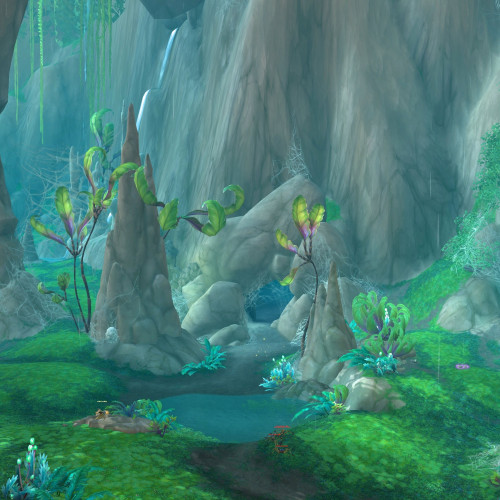
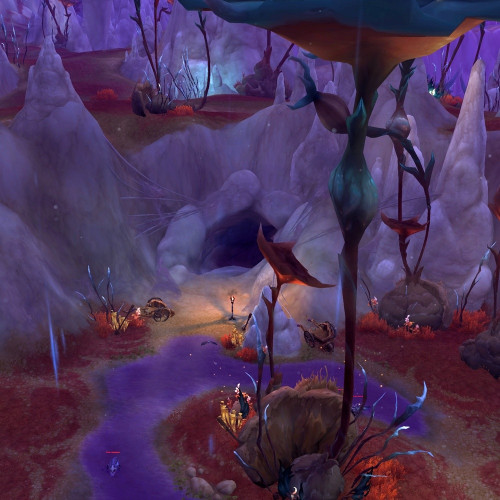
Well camoflauged; use the pond in front as a visual to find the correct side of the cliffs. Entrance faces southwest.
Boss
Under-Lord Vik'tis - Big "don't stand in it" fight - telegraphs frontal coneTips and Tricks
Keep an eye out for a Wrapped Spool in this dungeon; it gives a puzzle.The Waterworks Delve Location and Tips
Type: Kobold
Location
/
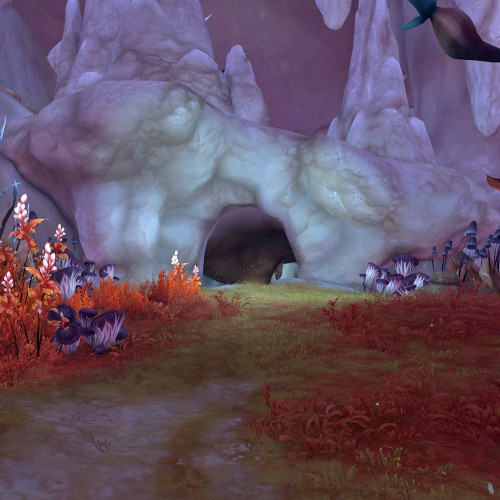
It's on the second level between two large waterfalls. The bridge to the entrance is near the righthand falls. Entrance faces north and slightly west. The outside map
Boss
Waxface - Most of his attacks are short-range AoE knockbacks with either Fire or Nature (poison) damage, such asMyomancer Cavern Delve Location and Tips
Type: Fungarian
Location
/
Located just under the M in Light's Blooming on the map. Need to circle around through Fungal Fields to reach it, but once in the area, it's fairly obvious. Entrance faces due west.
Boss
Bogpiper -Tips and Tricks
When you need to save the pigs, don't click them at low health. They sometimes turn into a hostile Shadow-Crazed Hog.Nightfall Sanctum Delve Location and Tips
Type: Shadow Caster
Location
/
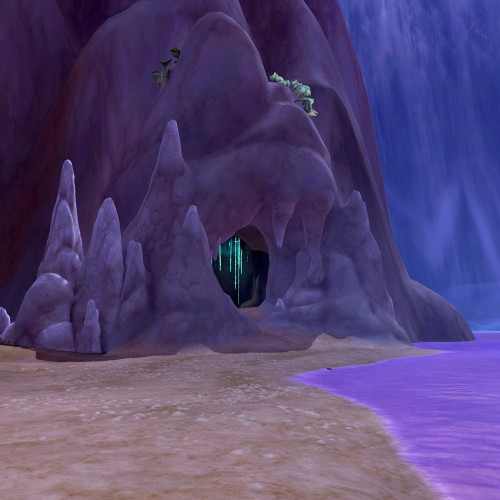
Entrance is at the very lowest level at the base of the giant semicircular waterfall. Cavern entrance faces northeast.
Boss
Speaker Halven has a nasty knockback,Tips and Tricks
If you're not sure how you're supposed to get down from the ship to get to the Treasure Room, look for the Parachute on your action button.Skittering Breach Delve Location and Tips
Type: Nerubian
Location
/
A large pond sits in front of the entrance at the lowest level. Cavern entrance faces east.
Boss
Nerl'athekk the Skulking has a variety of Shadow-based spells, includingTips and Tricks
Nerubian Ballista take you to side areas where you can often pick up treasure and Mislaid Curiosities. You will lose your pet when you use them.If you see purple ritual orbs cascading flying around in formations, don't worry about them. They don't do anything.
The Sinkhole Delve Location and Tips
Type: Kobyss
Location
/
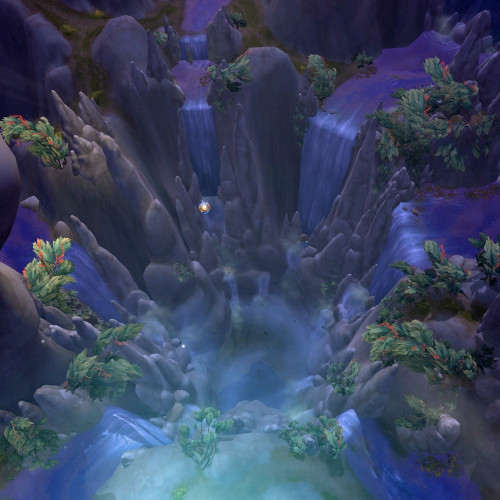
This really is a giant sinkhole in the middle of a massive circle of waterfalls. Fly all the way to the bottom; entrance is in the southern area of the landing.
Boss
Mirror Master Murkna - SummonsTips and Tricks
Water Breathing potions and spells work here. Air Bubbles are still good for buffing movement speed, although they incorrectly identify as increasing swim speed.Clicking the Flight Master Celle Wilde outside the entrance teleports you instantly to the sinkhole's rim.
The Spiral Weave Delve Location and Tips
Type: Nerubian
Location
/
Many elites here, but it's easy to fly directly into the front entrance and avoid it all. You can even fly out without disturbing the non-elite guards if you're careful. Only Delve in this zone not located in or near the City of Threads.
Boss
Overseer Kaskel - castsTak-Rethan Abyss Delve Location and Tips
Type: Kobyss
Location
/
Outside City of Threads, not inside. Go all the way to the bottom of a large waterfall cascading down from the city. Cavern faces north.
Boss
Undersea Abomination mostly casts Nature damage and is a nasty fight for melee-range classes.Tips and Tricks
The Wandering Gutter have some strange pathing in this Delve, so keep an eye on them if you're not interested in engaging. There is one area where they can invade an already-crowded area. If you're getting Supply Boxes, realize that there are more than 6 of them to loot, so you can skip the one that's in the middle of most crowded area.The Underkeep Delve Location and Tips
Type: Nerubian
Location
/
In the northwest lower level of the Tranformatory' land on the web bridges above. Several non-elite mobs pathing below; fly directly in to avoid them.
Boss
Researcher Ven'kex is a truly nasty fight. First thing that happens isTips and Tricks
If you get the Poison Traps, there is a timer for disabling these. One person doing these alone cannot do it with normal foot speed if there are three or more traps to disable. Use something to speed you up, like Dash, Grappling Hook, Demonic Gateway, etc.Zekvir's Lair Delve Location and Tips
Location
/
Inside the large building on the west side of The Skeins.
Nothing is known about this Delve, except that a few of the achievements will be tied to this encounter. This Delve will not open until after the launch of Season 1.
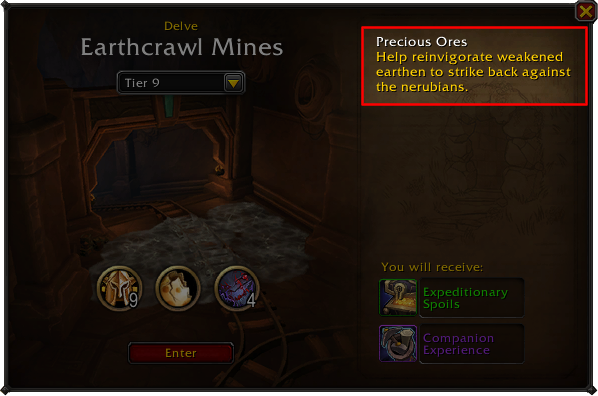
All Delve Story Variations
|
Delve Achievement
|
Delve Variants
|
|
|
|
|
|
|
|
|
|
|
|
|
|
|
|
|
|
|
|
|
|
|
|
Delve Achievements and Rewards
There are several achievements players can earn for completing Delves in The War Within. Some achievements will only exist through the end of Season 1 and will disappear when Season 2 starts. We'll highlight those that give rewards.Delve Title Achivements
-
Seeker of Loot
 Leave No Treasure Unfound - Find and open all Sturdy Chests hidden throughout the War Within delves.
-
High Explorer %s
 That Extra Push Over the Cliff - Successfully complete a delve on the highest tier of difficulty with revives remaining.
Delve Mount and Cosmetics Achievements
Source:
Giant beetles that spend their lives in the darkest tunnels of Khaz Algar. Though they are deprived even of the faintest glimmer of artificial sunlight, they still thrive.

Source:
Source:
